Antique Arms & Militaria


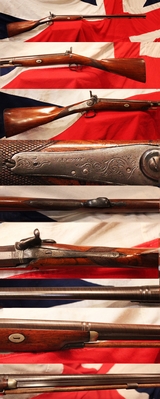
Wonderful Napoleonic Wars 'Brown Bess' Officer's Musket, Made by One Of The Most Famous & Greatest English Gunsmiths, Harvey Walklate Mortimer. A Fabulous Example, In Superb Condition. A Far Better Example Than The Mortimer Bess in The Royal Collection
Excellent steel on all parts, barrel and lock, finest walnut stock with stunning natural patina, very fine regulation pattern brass mounts, including side plate ramrod pipes and butt plate {regimentally numbered 10} both original sling swivels present. As this is the officers issue Brown Bess, this would be very unlikely to be a rack number, as the officers did not keep their muskets on racks with the other ranks guns, but in their quarters on campaign, thus it may represent the 10th (North Lincolnshire) Regiment of Foot.
The regiment served with particular distinction in the Napoleonic Peninsular War (1808-14) from 1812 to 1814. Their key campaigns were the Siege of Tarragona: The battalion formed part of General John Mackenzie’s 2nd Division in 1813.
The Battle of Castalla: Fought in April 1813, this was one of their major engagements, resulting in a successful allied victory against French forces. The Blockade of Barcelona: The regiment saw out the final stages of the Peninsular War in Spain through 1814 as operations shifted to Catalonia. The battalion also saw service in Malta, Sicily, and northern Italy
It would be very hard indeed to see a better example, of an officer's issue 'Brown Bess' {Third Pattern} anywhere. Another one of these India Pattern, 1st model ‘Brown Bess’, also by H W Mortimer, likely from the very same contract order, is now in the British Royal Collection, and it is not in anywhere in as good condition as this absolute beauty.
Harvey Walklate Mortimer (1753-1819) gun maker for His Majesty the King, was a British gunsmith known for his exquisite craftsmanship and innovative designs. His pistols, and muskets, often adorned with intricate engravings, were highly sought after by both military officers and civilians. Mortimer's work is characterized by its precision, balance, and meticulous attention to detail, showcasing a mastery of both form and function. His legacy continues to inspire gunsmiths and collectors today, cementing his place as a significant figure in the history of firearms.
The Royal Collection has an identical British infantry officer's example, made for the Napoleonic Wars, Object number:
XII.103, but their Brown Bess by Mortimer has been converted to a percussion action.
The 'Brown Bess' infantry musket was the standard weapon of the British infantry for more than a century.
From the Seven Years war, the American revolution, The Anglo French Wars and The Napoleonic Wars. Also soldiers on both sides of the Anglo American War of 1812 employed it in battle, staring down its barrel at opponents across distances of less than a hundred yards.
British foot soldiers marched into battle with this musket—nicknamed “Brown Bess”—for more than 100 years. British redcoats used the 'Brown Bess' to fight the War of Independence in the colonies, and many of their opponents in the Americans’ Continental army used it as well. British soldiers fighting in the Napoleonic wars carried it into battle, and it was the principal firearm used by the infantrymen who fought the War of 1812.
The Brown Bess had several distinctive features. It was a large-calibre weapon: the bullet it fired was a lead ball up to three-quarters of an inch in diameter, three times the diameter of a modern .22-caliber rifle round. The inside of its barrel was smooth: unlike more accurate “rifled” muskets used by the famous rifle regiments, the Brown Bess had a smooth bore with no grooves to make its fire more accurate. Soldiers loaded the musket through the muzzle, which meant that each bullet had to be forced down a longer than three foot barrel before firing. Even trained soldiers could only launch two or three shots per minute.
Because the weapon was slow to load and relatively inaccurate (experienced soldiers generally estimated its range between 50 and 100 yards), armies developed tactics that helped compensate for its shortcomings. The limitations of smoothbore muskets like the Brown Bess forced units employ “linear tactics,” in which a hundreds of soldiers stood in neat lines, shoulder-to-shoulder and out in the open. While such tactics appear decidedly unstealthy to twenty-first century eyes, they proved essential on the battlefields of all the conflicts which Britain was involved.
There, stealth was a low priority. Packing the men into blocks allowed officers to coordinate their troops’ fire into synchronized volleys. Firing a hundred guns in the same direction at once helped ensure that at least some, often most of the inaccurate musket balls found their targets. And grouping the men into neat lines out in the open helped commanders ensure that few of their troops gave in to the natural instinct to flee.
Of course, packing troops into blocks and fighting in the open required tremendous discipline from the individual soldiers. Infantrymen had to stand exposed to enemy fire as they loaded and fired their own muskets. And in some situations, soldiers learned the grisly dangers of fighting in lines—as at the Battle of New Orleans in the 1812 war, where American artillery attacked the exposed British formations with devastating effect.
The world changed in 1793, a mere 10 years after the loss of the American colonies. Britain found itself once again at war, this time with Revolutionary France. An army now reduced in size to an authorized strength of only 44,432 men had to be expanded rapidly, along with the local militia and volunteer forces. The call for muskets was huge. Indeed, in 1793 the total stock of muskets in all the armouries around Britain, including the central arsenal at the Tower of London, was around a mere 60,000. The stocks held in French arsenals amounted to over a very sensible 700,000. Although it is clear that we are currently abysmally unprepared for the defence of these islands today, 250 years ago, it was exactly the same, as it was in 1939 before WW2. Around 110 years ago former army general Baden Powell created the Boy Scouts with the motto 'Be Prepared', hopefully, to instill in those young minds, a sound and sensible life principle to counter the constant unpreparedness, for all manner of emergencies, of the British Government. A situation that the General Staff consistently find so tragic, yet it is never able to change the policy of the politicians, and this appalling deadly situation, continues, even unto today.
The Board of Ordnance had to fill the gap. They did this by ordering 10,000 muskets from the Birmingham and London gun trade
The lock is stamped by the primary, senior ordnance inspector, for arms provided by ordnance contractors for the armaments required for the Napoleonic Wars
Richard Duce {his mark of Crown 2}. He was also the controller of tempering & hardening of locks, after their arrival from the stores for fitting to the musket.
Stamped with London Gunmaker's Company proof marks. It has a hook breech and is secured by three slides. Lock engraved with the name of the maker Mortimer.
He also inspected all the EIC Brown Bess that were handed over to the British Ordnance for the Napoleonic Wars. An account that was confirmed to us by our friend and historic colleague, Howard Blackmore of the Tower of London armoury. read more
3950.00 GBP

A, Original Napoleonic Wars ‘Tower of London’ Brown Bess Musket. Third Pattern, Napoleonic Wars Issue. 39 inch Barrel Regulation Lock, Stock, Mounts and Fittings. Circa 1808 With Ring Necked Cock
A very good regulation Brown Bess ‘Tower of London’ India Pattern Musket of The Napoleonic Wars, Waterloo etc. The standard musket issued to the British soldier throughout the late 18th and early 19th centuries was the India Pattern model, made in two variants and used against both Revolutionary and Napoleonic France. The first model was introduced in 1793 and the updated version in 1810
Probably the most famous military flintlock musket in the world today, and certainly one of the most historically important and desirable long guns of its type from the Napoleonic wars.
In one day alone, June 1815, at the Battle of Waterloo, it is estimated four million rounds were fired by the 50,000 infantry {estimated at 80 cartridges per man} with their India Pattern Brown Bess muskets, at Napoleon’s army.
A typical regulation example exceptional and excellent condition, with a stunning colour and patina.
A British Napoleonic Wars regulation, regiment of the line issue musket, Crown GR and Tower, ring neck cock lock with government GR Crown stamp, regulation brass mounts, iron ramrod replaced. Walnut stock with signs of combat use but still exceptionally fine. A musket that it would be difficult to improve upon to find a better example.
The Brown Bess musket began its life almost 300 years ago, and it helped in creating one of the greatest trading empires the world has ever seen and, among other achievements, made the 'British Square' the almost undefeated form of infantry defence throughout the world. Made in four distinct patterns it originally started life as a 46 inch barrel musket called the Long Land or Ist pattern Brown Bess. Then in around 1768 the gun evolved and the barrel was shortened to 42 inches as 46 was deemed unwieldy and renamed the Short Land or 2nd pattern. Although the Long Land was made continually for another 20 years. With the onset of the Napoleonic Wars in the 1790s, the British Board of Ordnance found itself woefully short of the 250,000 muskets it would need to equip its forces. It managed to produce around 20,000 short land pattern muskets but this was simply not sufficient. At that time the British East India Company maintained it own troops and had contracted with makers to produce a simplified version of the Brown Bess musket with a 39-inch barrel and less ornate furniture and stock work. It was generally felt that the standard of these "India pattern" muskets was not up to the standard of the earlier Besses, but necessity required action so the authorities convinced Company officials to turn over their stores to the Crown. By 1797 the urgencies of war ultimately created the demise of the Short Pattern, and all manufacture was turned to building the more simple 'India' pattern. For the most part, the gun underwent few changes from its introduction until Waterloo, with the exception of the cock, which was altered from the traditional swan-neck style to a sturdier, reinforced ringed version in around 1808.
The Brown Bess musket was the standard weapon of the British for more than a century. soldiers marched into battle with this musket—nicknamed “Brown Bess”—for more than 100 years. British redcoats used the Brown Bess to fight the War of Independence in the colonies, and many of their opponents in the Americans’ Continental army used it as well.
British soldiers fighting in the Napoleonic wars carried it into battle, and it was the principal firearm used by the infantrymen who fought the War of 1812.
Because the weapon was slow to load and relatively inaccurate (experienced soldiers generally estimated its range between 50 and 100 yards), armies developed tactics that helped compensate for its shortcomings. The limitations of smoothbore muskets like the Brown Bess forced units employ “linear tactics,” in which a hundreds of soldiers stood in neat lines, shoulder-to-shoulder and out in the open. While such tactics appear decidedly unstealthy to twenty-first century eyes, they proved essential on the battlefields of all the conflicts which Britain was involved.
There, stealth was a low priority. Packing the men into blocks allowed officers to coordinate their troops’ fire into synchronized volleys. Firing a hundred guns in the same direction at once helped ensure that at least some, often most of the inaccurate musket balls found their targets. And grouping the men into neat lines out in the open helped commanders ensure that few of their troops gave in to the natural instinct to flee.
Of course, packing troops into blocks and fighting in the open required tremendous discipline from the individual soldiers. Infantrymen had to stand exposed to enemy fire as they loaded and fired their own muskets. And in some situations, soldiers learned the grisly dangers of fighting in lines—as at the Battle of New Orleans in the 1812 war, where American artillery attacked the exposed British formations with devastating effect.
Engagements for the infantry were traditionally at relatively close distances, often the result of closely controlled battlefield management. In 1811 a soldier of the 71st Regiment of Foot, writing of fighting the French at Fuentes de Onõro, recorded: “… during our first advance a bayonet went through between my side and clothes, to my knapsack, which stopped its progress. The Frenchman to whom the bayonet belonged fell, pierced by a musket ball from my rear-rank man. Whilst freeing myself from the bayonet, a ball took off part of my right shoulder wing and killed the rear-rank man, who fell upon me. We kept up our fire until long after dark. My shoulder was black as coal from the recoil of my musket; for this day I had fired 107 round of ball cartridge.”
This was not an uncommon account and it would have been just as true of Waterloo. If we were to take an average of 80 cartridges fired by about 50,000 allied infantry at Waterloo the expenditure of ammunition would have amounted to more than four million cartridges. Although not scientific, it does give a flavour of the ferocity of battle that Sunday in June 1815.
Barrel 39inch overall 54.75 inches long.
Action has a very good and strong mainspring. As with all our antique guns no license is required as they are all unrestricted antique collectables read more
3450.00 GBP

A Fine and Long, Saudi Arabian, Silver & Copper Alloy Dharia Jambiya 19th Century
A scarce jambiya to find as the smaller Omani and Yemeni types were made in far greater numbers over the past century.
A long bladed Dharia jambiya, with shbeyl hilt type, more within the short-sword size, with a flat beyd blade as opposed to the more frequently seen Omani dagger sized pieces. Late 19th century also called in the west a Wahhabi jambiya covered in geometrically patterned silver. A "Wahhabi jambiya" is a occidental collector's term. "Weapons of the Islamic World" by The King Faisal Centre, the Centre for Research & Islamic Studies categorises these by type, tribal or regional origin, not by religious sect.
Obviously jambiyas of this type were carried by Wahhabis and certain of the tribes they are associated with would be predominately Wahhabi.
These are from the Asir, Hejaz, Nejd (generally the South, West and Central Saudi Arabia) and were the origins and backbone of the "Ikwhan" which was of course Wahhabi. Dharia is the term used to describe the long dagger which originates from the west of modern day Saudi Arabia, around the Azir/Hijaz area, and down as far as Yemen.
The word Dharia appears to come from the Arabic Dhura'eyah which translates as Arm Long Dagger. These daggers are also called Sabiki, Sabak, Sabik etc depending on the spelling. The term Wahabite is also commonly used to describe these, but any direct connection with the Wahhabi Movement except perhaps the actual geographical area is likely very co-incidental, and perhaps that this style was one used by them.
The jambia was given its name because it is worn on the side of a person – the word jambia is derived from the Arabic word janb (Arabic: جنب, lit. 'side'). A jambia is constituted of a handle, a blade, and a sheath in which the blade is held. It is made of a certain sort of wood, to hold the blade that is fixed to the waist from underneath with an upward curved sheath. The belt that holds the jambia is made of tanned leather, or some thick cloth. There are specialised markets and handicraft markets that decorate it with golden wires.
The jambia handle often tells of the social status of the man who wears it. Jambias can be made with ivory handles or hilts of other rare and exotic materials.
T. E. Lawrence was famous for using a jambiya knife historically. read more
1100.00 GBP

Truly Exceptional, Original, Highest Grade Napoleonic Wars Period Museum Piece Silver Miquelet, A Magnificent Musket Dated 1776 Presented To Ali Pasha the Lion of Alexandria. An All Silver Mounted Miquelet Gun, Another Was Presented to President Jefferson
Just returned today from silver conservation.
Dated lock 1190 AH which translates to 1776 to 1777 AD. combined with Sultanate mark in script.
We were astounded when we were offered this fabulous presentation piece, also from the peak of the Ottoman Empire, that was almost certainly e near pair, presented to Ali Pasha, 'The Lion of Alexandria' the famous Great Pasha and ruler in the Ottoman Empire, to another, near identical Miquelet example, that we sold just a few months ago. It is also a near pair to one presented to President Thomas Jefferson {now in the Smithsonian}
Intriguingly, it is more than possible this fabulous silver mounted long gun was likely presented to Ali Pasha in order to counteract its previous presentation pair. When this Miquelet presented it may have been so gifted on behalf of either, The Duke of Wellington or Napoleon Bonaparte, as they were both currying favour with the Great Pasha, in order for him to change allegiances, which he did, from Napoleon to Wellington, and then assisted the Ottoman Army to eject napoleon from Egypt in 1802.
Muhammad 'Ali Pasha, also known as 'the Father of Egypt' and the 'Lion of Alexandria', held a significant role in shaping modern Egypt. After a long period of foreign occupation in Egypt, his ascendancy in 1806 marked a pivotal point as he established control over Egypt and Sudan, a domination that endured until the Egyptian revolution of 1952.
Born in Kavalla, Macedonia in the late 1760s, Muhammad 'Ali gained prominence as a commander in the Albanian military, collaborating with British and Ottoman forces to expel Napoleon Bonaparte's army from Egypt in 1802. After the allied forces withdrew, Muhammad 'Ali remained in power, eventually declaring himself Egypt's de facto ruler in 1806. He skillfully navigated the geo-political complexities of his time, securing recognition from the Ottomans as governor or pasha, and thereby successfully reinstating an autonomous and hereditary dynasty at a time when the Ottoman Empire was exerting growing control over other Arab regions.
Fabulous arms were the great pieces of choice in order to be presented from Kings, Emperors and Generals, to their foreign counterparts {other Kings, Emperors, and Generals} in order to sway their decisions of state, for alliances and influence, essential in times of great war.
This very type of magnificent silver inlaid long gun were renown as the presentation pieces of choice for Emperors, Kings, Pashas and Presidents. President Thomas Jefferson was presented another near identical example just like ours, in November 1805, by the Bey of Tunis, it is now part of the Smithsonian Collection of great arms, in America.
Photo 10 though is Ali Pasha’s other identical example, now in the Metropolitan Museum in New York. Clearly these magnificent silver long guns were the personal favourites of the great Pasha, likely one kept in each of his royal palaces, in his empire.
Ali Pasha of Tepelena had several residences and strongholds, with his primary palace located in Ioannina (modern-day Greece), where he ruled as the Ottoman governor. Additionally, he maintained significant fortresses/residences at Porto Palermo and in his hometown of Tepelenë (both in modern Albania).
Ioannina Palace: His main administrative centre and audience chamber were in Ioannina, which became a cosmopolitan hub under his rule.
Porto Palermo Castle: A well-known coastal fortress on a small peninsula near Himara, often associated with a romantic legend.
Tepelena Castle: A large, 4-hectare castle in Tepelenë served as a vital residence and stronghold.
Butrint Castle: He used a small, fortified, formerly Venetian, structure on an islet at the mouth of the Vivari Channel
Another singularly spectacular ‘statement piece’ for any collection of rare and fine arms or antiques. From the Napoleonic Wars era, made for the famous Ottoman ruler Ali Pasha.
**See photo 10 in the gallery for reference, and link below, to another almost identical example and another of Ali Pasha's miquelets now in the Metropolitan in New York
The great ruler of the Ottoman's, Ali Pasha was, at first, an admirer of Napoleon and formed a brief alliance with him during the Napoleonic wars, but, with changing winds he went against his previous ally to support the British. Napoleon thus sanctioned a planned rebellion against Ali, but the British arrived, as funds were being collected and rebels were being recruited.
Ali's rival, Ibrahim Pasha of Berat, turned to the French and gathered a coalition of Ali's enemies, including Mustafa Pasha of Delvinë, Pronio Aga of Paramythia, Hasan Çapari of Margariti, the Beys of Himara, the Aga of Konispoli and the Souliotes. This coalition began attacking Ali's realm with support from French artillery, and Ali responded by bribing Ibrahim's supporters with British support. Ali besieged Ibrahim Pasha in Berat with an 8,000-man army commanded by the Albanian captain Omer Bey Vrioni, and with the aid of British rockets, Berat finally fell after a year of skirmishing. Ibrahim retired to Vlorë, and Ali told the Porte that he had taken Berat in response to the revolts in upper Albania that were the result of Ibrahim's inability to rule
In 1809, Lord Byron together with John Cam Hobhouse visited Ali's court in Tepelena and Ioannina in 1809.
Byron recorded the encounter in his work Childe Harold. They traveled to Albania to see the country that was, until then, mostly unknown in Britain. Byron presented Albanians as a free people who lived in their state under their leader, Ali Pasha, described by Byron as a
"a man of first abilities, who governs the whole of Albania"
A near identical long gun of Ali Pasha, {the third of its kind} is in the Metropolitan museum, exhibited as the Miquelet Rifle of Ali Pasha. Being cognisant of the manipulations of great rulers of history, it is logical to assume the envoys of both King George for Wellington, and Napoleon were informed exactly how to impress the great Pasha, by presenting him with his favourite silver mounted miquelets, hand made by the rulers gunsmith in his empire. Thus with such magnificent pieces Ali Pasha would be swayed to agree to military alliances and mutual defensive pacts. It clearly worked, but likely both Wellington and Napoleon were unawhere just how ‘flexible’ he was in his allegiances.
His rule by Ali's definition, included central and southern Albania, and parts of mainland Greece; in particular, most of the district of Epirus and the western parts of Thessaly and Macedonia. He managed to stretch his control over the sanjaks of Yanina, Delvina, Vlora and Berat, Elbasan, Ohrid and Monastir, Görice, and Tirhala. Ali was granted the Sanjak of Tirhala in 1787, and he delegated its government in 1788 to his second-born Veli Pasha, who also became Pasha of the Morea Eyalet in 1807.
Ali's eldest son, Muhtar Pasha, was granted the Sanjak of Karli-Eli and the Sanjak of Eğriboz in 1792, stretching for the first time Ali's control down to Livadia and the Gulf of Corinth, except Attica. Muhtar Pasha also became governor of the Sanjak of Ohrid in 1796–7 and of the Sanjak of Vlora and Berat in 1810.
Similar finest examples may be viewed in the Topkapi Museum in Istanbul and the Hermitage in Russia. A most similar gun was presented to President Thomas Jefferson by the Bey of Tunis.
A simply superbly beautiful antique presentation long gun from the Early 19th century. A miquelet gun with a very high quality miquelet toe lock decorated with numerous chiseled and fretted silver panels and inlaid foliate arabesques.
The gun is richly inlaid with silver throughout and fitted with a chisseled bronze-brass butt plate, with matching silver barrel bands, and its original silver mounted ramrod. Figured hardwood three-quarter stock profusely inlaid over its full length with numerous silver plaques.
A most similar gun was a gift of the Russian Romanov Tsar to Augustus II King of Poland and Elector of Saxony on his coronation in Krakow.
That gun is published in the book Prunkwaffen: Waffen und Rustungen aus dem Historischen Museum Dresden by Johannes Schobel (Leipzig, 1973) p.249, pl. 178.
Guns of this style with miquelet actions, were popular throughout the whole of Central, Eastern Europe, Russia, the Caucasus and The Ottoman Empire. However this magnificent piece is a much, much higher quality example, made solely for presentation to potentates, rulers and the like, than is more often seen, and certainly sets it well apart from the usual plain miquelet musket of its type.
After the conquest of Istanbul by Mehmed the Conqueror at 1453, construction of the Topkapi Palace was started at the year 1460 and completed at 1478 .The Palace was built upon an Eastern Roman Acropolis located at the Istanbul Peninsula between Sea of Marmara, Bosphorus and the Golden Horn. Topkapi Palace, was the administrative, educational and art center of the Empire for nearly four hundred years since Mehmed the Conqueror until Sultan Abdulmecid who is the thirty-first Sultan. Although Palace was abandoned by the Ottoman Dynasty by moving to the Dolmabahce Palace at middle 19th century, the Topkapi Palace latterly became a world class museum containing some of the worlds finest antique arms and armour.
The year of Catherine II’s acquisition of the Gotzkowsky collection is the Hermitage museum’s birth date. In 1764 Empress Catherine II acquired the collection formed by Johann Gotzkowski for King Frederick II of Prussia. A rich Berlin merchant and founder of silk and porcelain factories in Berlin, Johann Gotzkowski was one of Frederick's agents, in charge of the purchase of works of art for the royal collection. Frederick II (the Great), owner of a wonderful collection of contemporary French paintings, ordered Gotzkowski to purchase paintings by old masters. The merchant was a zealous agent and it took him only a few years to put together a large collection, but by this time Frederick had lost large sums of money in the Seven Years War and he refused to make the purchase.
The enterprising merchant was forced to look around for alternative buyers and he offered the collection to Russia. Catherine II was pleased to take the opportunity of hurting Frederick's self-esteem and of proving that the Russian State Treasury, despite losses which were no less than those of Prussia, could still afford to make such an expensive acquisition. From this purchase onwards the Hermitage has become one of the foremost museums in the world, alongside the British Museum, The Metropolitan, The Louvre and The Prado.
This miquelet is 71 inches long, {our previous near pair example was 55.5 inches long overall}. This gun was likely made purposely longer in order to greately impress the Pasha that its presenter had greater respect for the Great Pasha. This of course, is, reasonable supposition, we have no way of knowing if it is correct.
As with all our antique guns no license is required as they are all unrestricted antique collectables.
For reference, the rifle of Ali Pasha
https://www.metmuseum.org/art/collection/search/28998
See photo 10 in the gallery of the Metropolitan Museums Miquelet Rifle of Ali Pasha
lock and stock, Algerian; barrel, European
lock and stock, dated A.H. 1224/1809–10 CE; barrel, 18th century
Every single item from The Lanes Armoury is accompanied by our unique Certificate of Authenticity. Part of our continued dedication to maintain the standards forged by us over the past 100 years of our family’s trading, as Britain’s oldest established, and favourite, armoury and gallery
Another magnificent and extremely similar Miquelet, undoubtedly by the same gunsmith of Ali Pasha, was the silver inlaid gun presented to President Thomas Jefferson presented by the Bey of Tunis in 1805 is a 7-foot-long, Miquelet-lock Jezail (musket). It was presented as a gift intended to strengthen diplomatic relations following the end of the Tripolitan War. It now resides by loan in the Smithsonian affiliated museum, the Buffalo Bill Museum of the West in Cody Wyoming
The musket was presented on November 30, 1805, at the Washington Navy Yard by Sidi Soliman Mellimelli, the ambassador of the Bey of Tunis.
Link;
https://americanhistory.si.edu/explore/stories/journeying-west-distinctive-firearms-travel-buffalo-bill-center-west read more
9995.00 GBP

Beautiful ‘Queen Anne’, London, Dragoon Officer's Long Barrel Horse Pistol, Lock Named James Barber A Most Beautiful Example.
12 inch Barrel, bearing early barrel proof stampings of A.R., the crossed sceptre gunsmith proof markings of Queen Anne, 1702-1714, stamped in the early period position, at the top of the breech of the barrel. Later on, and henceforth, proof marks were stamped on the left hand side of the breech. The pistols military furniture is all brass, with a typical officer's type short eared style skull crusher butt cap terminating with a grotesque mask the early type, from the time of King William IIIrd, before the long spurred style became fashionable in the 1740's. The lock is the early banana form, typical of the earliest 18th century long pistols, with a the good and clear name of Mr. Barbar inscribed. It has a good and responsive action. The stock is fine walnut. It has a single ramrod pipe, also typical of the early Queen Anne style. This would not be a trooper's pistol, but a officer's private purchase example, from one of the great makers and suppliers to the dragoon regiments and officers of his day, during the time of King George IInd. This pistol would have seen service during the War known as King George's War of 1744-48, in America, and the 7 Years War, principally against the French but involving the whole of Europe, and once again, also fought in America. Recognized experts like the late Keith Neal, D.H.L Back and Norman Dixon consider James Barbar to be the best gun maker of his day. Dixon states, "Almost without exception, unrestored and original antique firearms made by James Barbar of London are of the highest quality". In Windsor Castle there are a superb pair of pistols by James Barbar and a Queen Anne Barbar pistol also appeared in the Clay P. Bedford exhibition at the Metropolitan Museum of Art. Barbar supplied complete dragoon pistols for Churchill's Dragoons in 1745, also guns for the Duke of Cumberland's Dragoons during 1746 to 48, and all of the carbines for Lord Loudoun's regiment of light infantry in 1745.
James was apprenticed to his father Louis Barbar in October of 1714. Louis Barbar was a well known gun maker who had immigrated to England from France in 1688. He was among many Huguenots (French Protestants) who sought refuge in England after the revocation of the Edict of Nantes by Louis XIV in 1685. Louis was appointed Gentleman Armourer to King George I in 1717, and to George II in 1727. He died in 1741 .
James Barbar completed his apprenticeship in 1722 and was admitted as a freeman to the Company of Gunmakers. By 1726 James had established a successful shop on Portugal Street in Piccadilly. After his father's death in 1741, James succeeded him as Gentleman Armourer to George II, and furbisher at Hampton Court. He was elected Master of the Gunmakers` Company in 1742. James Barbar died in 1773.
The book "Great British Gunmakers 1740-1790" contains a detailed chapter on James Barbar and many fine photographs of his weapons. This lovely pistol is 19 inches long overall. It has had some past overall service restoration within the past 100 years. The mainspring, stock were replaced, as was the ramrod. But, it is often the case as this pistol may likely have seen somewhat rigorous combat service during its working life for upwards of 80 years. It is a beautiful looking pistol, and a fine looking example of the early British military pattern gunsmiths. As with all our antique guns no license is required as they are all unrestricted antique collectables read more
5850.00 GBP
A Beautiful 19th Century Damascus Twist Barrelled Sporting Gun By Manton of London. One Of The Greatest Names In the Realm of English Gunsmiths
Back action lock bearing Manton's name and decorative pattern engraving. It has a hook breech with double platinum lining and very attractive fine Damascus browning, walnut half stocked with steel furniture bearing further overall engraving.
Joseph Manton (6 June 1766 - 29 June 1835) was a British gunsmith who innovated in sport shooting, improved the quality of weapons and paved the way to the modern artillery shell. Joseph was also a sports shooter in his own right and a friend of Colonel Peter Hawker. There were two Manton brothers, John was the elder and Joseph the younger. John Manton was born in 1752 and after his apprenticeship, set up in London in Piccadilly.
Manton began producing percussion guns in 1825 and Manton himself died in 1834, leaving the business in the hands of his son. Some of Manton's weapons are considered the finest of the flintlock and percussion age. They can fetch more at auction than Holland & Holland's shotguns. His workforce included James Purdey (who went on to found Purdey's), Thomas Boss, William Greener and Charles Lancaster. These four all went on to establish major firms of gun makers, which continue to this day. The true English Damascus barrel is prepared from three rods, twisted as described and put together as shown in the twisted riband, and is known technically as three-iron Damascus ; the silver-steel Damascus is similarly made, but of different metal piled in a different order. The rods having been twisted, and the required number welded together, they are sent to the iron-mill and rolled at a red heat into ribands, which have both edges bevelled the same way. There are usually two ribands required for each barrel, one riband or strip to form the breech-end, and another, slightly thinner, to form the fore, or muzzle, part of the barrel. Upon receiving the ribands of twisted iron, the welder first proceeds to twist them into a spiral form. This is done upon a machine of simple construction, consisting simply of two iron bars, one fixed and the other loose ; in the latter there is a notch or slot to receive one end of the riband. When inserted, the bar is turned round by a winch-handle. The fixed bar prevents the riband from going round, so that it is bent and twisted over the movable rod like the pieces of leather round a whip-stock. The loose bar is removed, the spiral taken from it, and the same process repeated with another riband. The ribands are usually twisted cold, but the breech-ends, if heavy, have to be brought to a red heat before it is possible to twist them, no cogs being used. When very heavy barrels are required, three ribands are used; one for the breech-end, one for the centre, and one for the muzzle-piece. The ends of the ribands, after being twisted into spirals, are drawn out taper and coiled round with the spiral until the extremity is lost, as shown in the representation of a coiled breech-piece of Damascus iron. The coiled riband is next heated, a steel mandrel inserted in the muzzle end, and the coil is welded by hammering. Three men are required one to hold and turn the coil upon the grooved anvil, and two to strike. The foreman, or the one who holds the coil, has also a small hammer with which he strikes the coil, to show the others in which place to strike. When taken from the fire the coil is first beaten upon an iron plate fixed in the floor, and the end opened upon a swage, or the pene of the anvil, to admit of the mandrel being inserted. When the muzzle or fore-coil has been heated, jumped up, and hammered until thoroughly welded, the breech-end or coil, usually about six inches long, is joined to it. The breech-coil is first welded in the same manner, and a piece is cut out of each coil; the two ribands are welded together and the two coils are joined into one, and form a barrel. The two coils being joined, and all the welds made perfect, the barrels are heated, and the surplus metal removed with a float; the barrels are then hammered until they are black or nearly cold, which finishes the process. This hammering greatly increases the density and tenacity of the metal, and the wear of the barrel depends in a great measure upon its being properly performed. A very nice and tight action and overall in nice condition for age. A very small piece of wood lacking from the breech tang area. As with all our antique guns no license is required as they are all unrestricted antique collectables read more
975.00 GBP
A Simply Superb. Antique, Wild West, Original .32 rimfire Remington Elliot 1860-61 patent, Cased Four-Barrelled Derringer Pistol. As Good, If Not Better, Than Any to Be Currently Seen In American Wild West Museums. Cased by T Underhill of Manchester
A .32 (Rimfire) Remington Elliot patent, Cased Four-Barrelled Derringer Pistol, serial no. ,
circa 1860’s to 70’s, with four 3 3/8in. barrels, the false rib on the left hand side signed 'MANUFACTURED BY E. REMINGTON & SONS ILION N.Y.', the right 'ELLIOT'S PATENTS MAY 29 1860 - OCT 1 1861', release latch below barrel group, open hinged frame with concealed striker, flared grip with smooth moulded hardwood inserts and ring trigger, good original finish remaining, with little or no areas of age pitting. Compared to regular multi shot pistols the production run of this pistol was very low, around 9,000, thus making fine quality and condition surging examples very rare indeed, and cased examples , far far rarer indeed. For example Remington sold over 150,000 of their commercial double barrelled Derringer pistol
Patented during the US Civil War and used in the great Wild West era of America’s Frontier history, this absolute beauty is simply a joy to see. If one was searching for a fine example of these iconic Derringer pistols look no further, this may well be the best you will ever see for sale in Great Britain. Not to mention it is stunningly originally cased in a superb Victorian pistol box, of fine quality, and wonderfully preserved and thus presented as good as any museum piece you may see.
Cased by T Underhill of Manchester {lock case maker marked} 2 Corporation St. He operated at that address for six years up to 1868. A bespoke case maker for instruments and pistols.
Evidence of the practicality of this Pepperbox derringer is found, in infamous sportsman, Grantley Berkeley’s own words, after being presented with one in the Civil War period, when he was in St. Louis, Missouri. He remembered the pistol as “…the most perfect little bijou of a revolver I ever saw in my life… In size it is so small that I carried it in my waistcoat-pocket, and in execution so effective that at eight yards I could shoot as correctly, if not more so, than I could with my favourite pair of John Manton duelling pistols....”
Grantley Berkeley (1800–1881) was a 19th-century British politician, writer, and infamous sportsman whose reputation for violence culminated in an infamous attack on a magazine publisher. Armed with a hunting whip and concealed pistols—often colloquially associated with period derringers —he brutally beat a magazine editor. This led to a widely publicized pistol duel, where he and his opponent fired three shots each with no injuries
"In 1859, the Western United States was still huge, wild, and open. Englishman Grantley Berkeley decided to have a hunt there and so embarked on an adventure very few of his countrymen would ever even contemplate. Enlisting the services of Americans, this plucky Old Countryman got to live out his fantasy of adventure on the high plains. Camping in the open, hunting enormous herds of buffalo, shooting other game and living the life. And he manages to tell the tale with great humor (humour) and keen observation of American social life, habits, and scenery."
Review of The English Sportsman in the Western Prairies
By Grantley Fitzhardinge Berkeley · 1861
1 gallery photo of Harper’s Weekly advertisement for the Elliot Remington Derringer in 1864
T. Underhill, 2 Corporation St, Manchester. Thomas Underhill, a qualified optician, that, according to Clifton’s Directory of British Scientific Instrument Makers, 1550–1851 (1995), worked at the following addresses in Manchester: 40 Water St (1834–1838), 70 Bridge St, Deansgate (1841), 4 Old Millgate (1848), 2 Corporation St (1858–1864), 4 Corporation St (1868), and 53 Princess St (1873–1881) Creating bespoke cases for all manner of instruments and pistols made by respected Victorian makers such E.Remington and Sons, Buron of Paris, McAllister & Brothers (1855) and Negretti and Zambra (1859
Overall in superb working order, nice tight action, and it is an obsolete, antique collectors item, that requires no restriction or licence to own and display as a collectors item.
Photographed with our small boot sized gamblers Bowie knife {not included}
No key for the lock read more
1995.00 GBP

Absolutely Beautiful & Captivating Pair Of American Revolution Period 18th Century 'Queen Anne' Cannon Barrel Pistols with Silver Inlays & Solid Silver Grotesque Mask Butt Caps. Near Identical To Another Recovered From a Shipwreck off The Florida Coast
A wondrous pair of breech loading pistols of exquisite quality and extravagance, around 250 years old. In fabulous condition for age.
A single pistol, near identical, also with likely Charles Freeth silver mounts and inlays, is in the Metropolitan Museum in New York, Object Number: 37.189.4.
Superb silver grotesque mask butt caps and elaborate fine line silver inlays, possibly by Charles Freeth, {his signature grotesque face form butt-caps are featured stunningly depicting scrolls and shells. With steel cannon barrels, boxlock actions, sides, finely engraved with elaborate rococco scrolls, with a safety mechanisms enabled by sliding the trigger guards forward once the pistol is cocked. Excellent tight and crisp actions.
Maker marked by master gunsmith Mr Thomas Archer of Birmingham, circa 1776. Known as a 'Queen Anne' flintlocks these are both stunning examples in wonderful condition. Very unusual form of demon face grotesque butt masks in silver. Examples of his pistols are in the British Museum.
The ‘Queen Anne’ style pistol is distinctive in that it doesn't require a ramrod, as they are the earliest form of breech loading pistols. The barrel of the pistol unscrews and allows it to be loaded from the rear, and near the touch hole, at the breech of the barrel. These pistols were originally made in flintlock.
The Queen Annestyle pistols were very popular for the elite and highest status of society, and were made in a variety of calibres, usually about 38 to 50 bore. Boot pistols, Holster pistols, pocket pistols and Sea Service pistols may be made in the 'Queen Anne' style. This type is known as a Queen Anne pistol because it was during her reign that it became popular {although produced for some decades after the reign of Queen Anne}.
The finest examples were made with silver fittings and or inlays such as this.
These pistols are extremely similar, if not identical to a single pistol found in 2010, within a shipwreck off St Augustine USA.
Our pistols must have been made at the same time as the flintlock found in the Revolutionary War ship wreck. A ship that was lost in a storm on New Year's Eve 1782 off the coast of St Augustine, Florida. That extremely similar pistol was by T.Ketland, and now resides on display in the St Augustine Lighthouse and Maritime Museum.
The story of an American Revolutionary War shipwreck, excavated by Museum archaeologists and students from 2009-2014, and the recovered artefacts from the 1782 British Loyalist wreck found just off St. Augustine’s coast. It was determined that the wreck carried loyalists or Tories evacuating Charles Town, South Carolina and fleeing to British, East Florida which was still loyal to the crown. As many as 16 ships from Charleston (the name of Charles Town today) wrecked on the St. Augustine sandbar on New Year's Eve, December 1782.
As British loyalists ran in fear of the victorious Americans, many lost everything they had to the sea.
Among the rare artefacts discovered, covered in concretions, was an identical to our silver scroll inlaid gentleman's pistol, made by Thomas Ketland in London, England.
In addition, an archaeologist found the ship's bell, which was devoid of any markings. The lack of the Royal Navy motifs, such as the broad arrow, provides a clue that this ship may have been privately owned. Also, archaeologists recovered a very early carronade ( small, deck-mounted cannon) made in 1780 in the Carron Ironworks in Scotland.
We include in the gallery photos of the recovered identical pistol, covered in concretions, and another picture of an X Ray, clearly showing that the recovered pistol is so much the same as ours, even down to the silver scroll engraving that was revealed in the x ray on the pistols
Each pistol is approx 8.5 inches long
The commander in chief of British forces General Gage's Impact on the War efforts to clamp down on the colonists' ability to arm themselves were a primary catalyst for the conflict. The effort to confiscate weapons caches at Concord escalated into the famous Battles of Lexington and Concord in April 1775, formally igniting the American Revolution.
General Gage, a great friend of George Washington from the previous Anglo-French-Indian War, was supposedly also a possessor of a pair of the same form of ‘Queen Anne’ pistols. His ancestral home and estate, Firle Place, is local neighbour of the Lanes Armoury’s partners farm near Lewes {several of our family’s dogs were bred and raised on the Gage estate}. He was a fine, brave and noble commander in the Anglo French War. Gage commanded the vanguard on Braddock’s expedition against the French in the Ohio Valley. On July 9, 1755, the force blindly marched into a forest ambush at Fort Duquesne, was nearly annihilated, and Braddock was killed. True to form, Gage conducted himself with courage in combat. Wounded himself, he improvised a rear guard that allowed the escape of George Washington,.
However he was not a general of great success in the build up to the Revolutionary War, and at Bunker Hill, in 1775, it was his ultimate pyrrhic victory. And, he was of even less success, due to political circumstances, as a governor of Massachusetts, it was noted at the time, even by his enemies, he was a good and wise man surrounded by his difficulties, thus he was ultimately replaced by General Howe. If he had stayed, and been rewarded by his pleading for adequate re enforcements and support for his more conciliatory ideas from England, things may have turned out very differently in the Americas, for he was known for his tact and reasonableness in negotiations, but he was replaced by men of a more military mindset.
Two other famous ‘Queen Anne’ pairs of pistols of the same form are currently in US Museums;
The incredibly famous ‘Ward & Steele’ Pistols: A historical pair of Queen Anne-style flintlocks carried during the American Revolution. Once looted from the Valley Forge Historical Society Museum.
‘William Lytle's’ Pistols: Stunning Queen Anne pistols carried in the American Revolution.
The near matching pistol in the Met {link}
https://www.metmuseum.org/art/collection/search/29609
The "Ward and Steele" pistols refer to a historic pair of 18th-century Queen Anne-style flintlock pistols. These rare firearms were part of a collection of artifacts stolen from the Valley Forge Historical Society in the early 1970s. After a decades-long cold case, the pistols were recovered by the FBI and repatriated to the Museum of the American Revolution in late 2021
As with all our antique guns, no license is required as they are all unrestricted antique collectables read more
3650.00 GBP
A Remarkable, Beautiful Fine Condition and Rare Six Barrel Revolver Pistols, Circa 1835, by Fine English Maker Egg of London. One Of The Most Beautiful Examples We Have Seen In Many Years
An absolutely stunning 19th century circa 1830 to 1840 pepper box revolver with six revolving cylinders. Although a rarely seen earliest form of revolver, most all steel construction, and very few pepperbox were made with brass frames, which creates a stunning contrast.
Traditional hammer in the bar form, maker engraved by egg of London one of the great names of British gunmaking.
Excellent brass frame with superb scroll engraving fine action beautifully crisp and an absolute joy to behold a combination of walnut brass and steel to result in an iconic pistol of the pre-and early Victorian period
Jean Joseph Egg (1775-1837) was the brother of Durs Egg and worked for Henry Tatham from 1801. The two men later co-founded the company Tatham & Egg. In 1814 Joseph opened his own shop at Piccadilly Circus.
In 1800 he took out a patent for a “method of bending steel without the assistance of heat, which may be applied to the manufacturing of surgical instruments.” In 1814 he advertised a self-adjusting truss, invented by him, protected by a German patent, used in many hospitals, and made at his shop at the corner of Piccadilly and the Haymarket. While these were both financially advantageous endeavors, his true fortune and claim to fame came from his guns.
Joseph was probably the most creative of the entire Egg gunsmith dynasty. His specialty at first was a new type of miniature pistols (pocket pistols) of the highest quality, whose precision is reminiscent of the work of watchmakers. They have one or two barrels and fittings made of engraved silver, in some cases even gold. This was followed by a whole series of inventions and patents. Joseph Egg’s weapons can be found in Windsor Castle, the Leningrad Hermitage and the Metropolitan Museum of Art, New York.
The 'pepperbox' 6 shot revolver was an amazing progression from the single shot percussion pistol, that worked on the rotating multi barrelled principle before the concept of a revolving cylinder and a single barrel system was invented. the style of the pistol created its nickname of the pepperbox as it looked somewhat like a peppermill, but they most often were large belt or holster pistol sized, whereas the pocket Derringer sized type, being the scarcest of all, is most rarely seen to survive today.
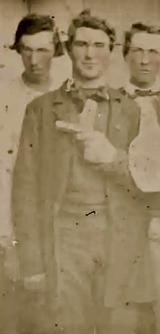
The pepperbox revolver was still being used in the American Civil War, especially by Southern soldiers due to the lack of arms, a photo in the gallery shows a Confederate corporal holding his belt size pepperbox revolver, and he looks barely 13 years of age.
In the 1850s, the extreme popularity of antique derringer pistols swept the nation like wildfire. Henry Derringer, the man who made the first Philadelphia Derringer, created a small and concealable pistol for people to carry for protection. When searching for an antique derringer pistol for sale, one will notice that derringers are made by a number of different brands and manufacturers. Many people wanted to make their design number one and stick out among the rigorous competition. One man that took the idea into his own hands and became a favorite in the Old West for pocket sized guns was Christian Sharps
Sharp had been in the business of rifle making before he endeavored into pocket pistol designs. He started his career in Harpers Ferry, Virginia with John Halls Rifle Works. He patented his own Sharps rifle in 1848 and, interestingly enough, a year later in December 1849, he patented his first design for the antique derringer pistol he desired to create. Unfortunately, it was a poorly constructed and fragile design in need of some work before it could be sold commercially.
The antique derringer plus sized pistols became known as the ‘hideout pistol’ to westerners. The prominence of these small multi shot pocket pistols as a gambler’s gun arose in the the Old Wild West. The gun was very commonly used by gamblers and tavern frequenters since they could slide it up their sleeve or in their pocket without the people around the being any the wiser. Western outlaws loved the conceal ability and carried the gun as an extra side arm. The gun is sometimes referred to as the perfect concealable pistol.
Tight and crisp spring, action rotates nicely
No licence is required to own and collect this antique pistol
Condition excellent plus read more
1495.00 GBP

A Superb, Original, Antique 'Wild West' Period Winchester Cavalry Carbine. The Favourite Repeating Rifle of President Theodore 'Teddy' Roosevelt and Cowboy Movie Star John Wayne. Probably The Most Iconic Rifle In the World
This is an absolute beauty one of the best we have seen in a long time. A fabulous and iconic piece of original Wild West history.
Good walnut stock and fine still with good natural age patination. Round barrel 20 in., half stocked with short tube magazine, ladder back sight, & saddle ring,
The world famous Winchester Lever Action Repeating Rifle was The weapon of choice of US President Theodore 'Teddy' Roosevelt. Who was quoted as once saying,
"I don't know how to shoot well, but I know how to shoot often.”
Roosevelt’s deeds with his Winchesters are certainly the stuff of legend. You could hardly be expected to find a more colourful figure so strongly linked to something that is now, and in no small measure due to his patronage, considered a household word and so instantly recognizable. Once, while on a hunting trip, he led in the capture of three riverboat thieves with his Winchester at the ready. Another time while riding the perimeter of his ranch, he was set upon by a band of restless Sioux. One clear view of his Winchester across the saddle and they soon scattered. He would have been photographed holding a Winchester carbine atop San Juan Hill during the Spanish-American War had he not given it to another trooper in his unit who was without a rifle at the time.
He was a human dynamo. He was the 26th and youngest President of the United States. He was a Medal of Honour winner, an avid hunter, a Nobel Prize winner, a wildlife conservationist, a war hero, a Life member of the National Rifle Association, the author of 39 books, a father of six and the most gun-savvy man to ever occupy The White House. When it came to gun knowledge or shooting skill, no chief executive, now or then, was his peer.
He special ordered his first Winchesters in the late summer of 1881, possibly to celebrate the publication of his second book, The Naval War of 1812. He ordered a pair of consecutively numbered Model 1876s, and these guns would be similar in composition to nearly every one of the next 20 Winchesters that he ordered.
There was one specific rifle John Wayne chose to use again and again in his cowboy appearances: The Winchester 1892 Rifle.
John Wayne was as prolific as he was iconic. He appeared in more than 170 movies, starred in more than 140 and often had several movies in theaters simultaneously. He could make almost any movie he wanted, with anyone he wanted, for any salary he wanted. Yet with all that flexibility, there was one specific rifle John Wayne chose to use again and again in his cowboy appearances.
It was the same rifle that had help make him a star. Director John Ford took the then-struggling actor and featured him in Stagecoach as Henry “the Ringo Kid,” the rifle-slinging criminal bound for revenge and redemption at the end of a dusty wagon trail. Wayne’s character was given a signature firearm: a big-looped Winchester Model 92 Trapper with the barrel chopped short.
Ford had the gun shortened so Wayne could swing it under his arm in a sweeping, theatrical motion when reloading. The move and movie were hits with audiences and forever changed Wayne’s career. The world had fallen for Wayne’s performance, and Wayne had fallen for the Winchester’s light, lithe design.
The Winchester was the byproduct of John Browning’s Winchester. The 1886 was a popular lever action among sportsmen, but it was chambered in .45/70 and required a substantial—i.e. heavy—gun. At 9 1/2 pounds, the 1886 was just that. Shooters who didn’t need bear-stopping power wanted a lighter rifle that came chambered for the pistol/rifle cartridge .44-40 and similar rounds of the day. The slimmer and sleeker 1892 was the result.
The 92 came in both a rifle and carbine configuration, each lighter than the 1886. Consumers wanted an even lighter version. Winchester responded by chopping the carbine down again to produce the special-order Trapper, available with 12- to 18-inch barrels.
Though lighter than the 1886, the 92 was still a solid machine that could handle strong cartridges. Winchester and Remington made special high-velocity, smokeless powder .44-40 offerings with the 92 in mind. Lesser guns that were accidentally fed the ammo buckled and caused the makers to take the loads off the shelf. The 92 had no problems.
Ranchers and riders like the ones Wayne would later portray fell in love with the 92 and gave it their cowboy seal of approval.
President Theodore Roosevelt, a former US Army 'Rough Rider', was a fan of the gun;
Rear Admiral Robert Peary took one on his successful North Pole expedition. Other movie icons used the gun as well:
Steve McQueen used a 92 in Wanted Dead or Alive, and
Chuck Connors carried one in The Rifleman.
In an era and industry that glamorized 1,000-yard revolver shots with guns that never needed reloading, Wayne was a firearms realist. Real cowboys would have used rifles whenever possible, and Wayne brought that level of authenticity to his films. He even used his own guns in his later career, preferring them to replicas that didn’t do the firearms world justice. The 92 was the kind of rifle cowboys used, so that’s the kind of rifle Wayne wanted.
Rooster Cogburn carried a 92 in one hand and a single-action revolver in the other, his horse’s reins in his teeth, in True Grit. The movie, in part thanks to that memorable scene, won Wayne the first Oscar of his long career in 1970. He later said that, if he had known the movie would have won him the award, “I’d have put that patch on 35 years earlier.” The Winchester would have been there too, ready to fire.
Fans clearly loved the man and the rifle. Numerous Wayne commemoratives and reproductions have been made over the years as a result. Winchester made several, including an appropriately chosen 92 on his centennial birthday in 2007, and, curiously, a Model 94 with his movie titles engraved on the decorated receiver.
Like Barbara Mandrell and country, Wayne had a big-loop lever action long before it was cool. Now function is following form: Shooters who wear gloves in cold weather or cowboy action shooting benefit from a larger loop like the Duke’s. Factory guns are being offered with the loop option and larger loops are being installed as an aftermarket feature on older guns.
Stagecoach (1939): Wayne's breakout role where he first debuted the famous lever-twirl.
El Dorado (1966): Used in the film's climax, famously employed one-handed because his character suffered from nerve damage.
True Grit (1969): Used heavily by his character Rooster Cogburn.
Rooster Cogburn (1975): The direct sequel to True Grit, in which he used the exact same rifle.
Original Hollywood prop rifles used by Wayne are highly sought-after collector's items; for example, a Model 1892 used in True Grit and Rooster Cogburn sold at auction for $88,500.
The US Army "Rough Riders" was the famous 1st United States Volunteer Cavalry Regiment that fought in the Spanish-American War. Formed in 1898, it was commanded by Colonel Leonard Wood and Lieutenant Colonel Theodore Roosevelt. The diverse, highly publicized unit gained legendary status for several key reasons: Diverse Ranks: The regiment was a colorful mix of cowboys, gold prospectors, miners, hunters, Native Americans, and Eastern Ivy League athletes.Action in Cuba: Deployed to Cuba, the regiment fought notably in the Battle of Las Guasimas and famously charged up Kettle and San Juan Hills near Santiago, securing a pivotal victory.Fought on Foot: Although organized as cavalry, the Rough Riders had to fight as foot soldiers because logistical issues left most of their horses behind in Florida.
"The Winchester stocked and sighted to suit myself is by all odds the best weapon I ever had, and I now use it almost exclusively ... .”
—Theodore Roosevelt, Hunting Trips of a Ranchman.
The British War Dept. purchased a few thousand of this Winchester pattern and we show in the gallery a super photograph of a RN gunboat crew displaying their Winchester rifles.
As it functioned with a calibre round still available today, like almost all Winchester rifles today, it had to be deactivated {with EU certificate} but the lever action still works just as it did, and all the work is achieved internally.
For sale within the UK mainland only read more